Featured post

LAYERING

LAYERING ---- Honestly, I really love cold weather. It's chill, cooling and the best thing is..... Layering - I loves doin...

Friday, 3 January 2014

THE HEIRS - DREAMCATCHER


DREAMCATCHER - After watched this Korean drama "The Heirs", me and my friends start to addict with this drama. The first thing I have learned was this dreamcatcher where it can helps you to catch all the bad dreams so that you could have a beautiful dream every night. I admit I do not know any of this until I watched this drama.


After awhile I have thought that I might able to make this myself. So I tried and it works. I tried to do something new so I recreate it into a bracelet. After you have manage the skill, you can actually make a necklace as well.
So here's the step of the dreamcatcher bracelet. It's very simple. All you need is patient.

All you need is :
1) String
2) Metal String
3) Beads
4) Cellophane Tape
5) Glue
6) Scissor
___________________________________________________________________________

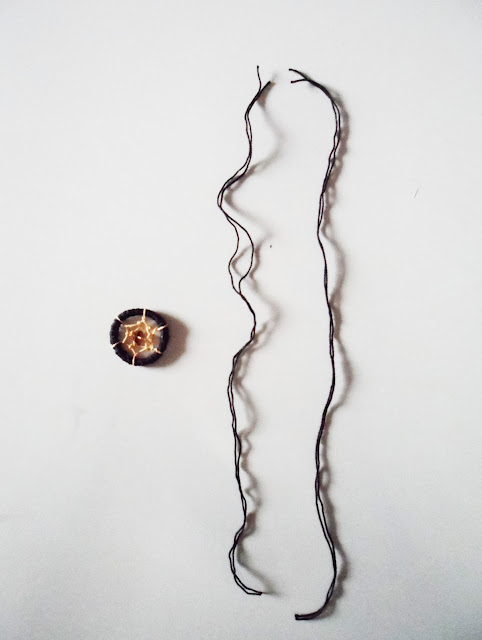
Start the ring bracelet by using the metal string to make a round shape. Maintain the shape using cellophane tape to roll around. Use this black string to roll it all the way to the starting point. Roll it tightly and more layers to make the ring stronger.

Fill in the beige string like a spiderweb. Tied a knot then roll it according to picture shows. Continues with the second layer. Finish it after adding a beads and tied it.


Do the square knot as a design and done. I will show you the picture how to tied square knot at the bottom of this post.


Now you got your dreamcatcher on you hand!  :D


SQUARE KNOT

*Please note: I choose this picture with different colour string so that you can understand it clearly and know what is going on.


Do you like the D.I.Y dreamcatcher today? Remember to give me some comment. ^.^


Wednesday, 1 January 2014

Back-to-School


New Year, new you! The start of the year calls for a great first impression and the perfect first day ensemble. Whether you want to add a campus-cool twist to your summertime staples or are planning on premiering your brand new wardrobe buys, I’m sure you've already put a lot of thought into your debut look. Get ready for an A+ in first-day style.


Sunday, 22 December 2013

MANNISH CHIC


Mannish Chic - A style that I obsessed. A little mannish but yet chic. I like the idea of men and women exchanging outfit style. It is how people dress and live today. I have layering it a sleeveless white shirt with a white blouse. Point of this style, I have just button up 2 buttons from top. Simplicity yet detail.


PRESENT PERFECT

A file that can make you looks chic and unique. This is s file were normally you bought it in stationary shop to puts your document. But here is not the same situation. I have made up my mind to do this in PU. Once finished, I felt like i wasn't like any other common file yet it's a clutch you can be. It's simple and quick. So shall we?

All you need is....
1) PU
2) Papers
3) Flat Stud
4) String
5) Hammer
6) Scissor
_________________________________________________________________________

Started with a draft of pattern card to tracing easily. Make sure it is bigger than A4 size paper if you would like to put your document in.

After cut out the PU, hammer it the part that I highlight to fix the shape well.

Draw circles by using any round stuff. I used my cellophane tape to get the shape. Punch a hole in the middle of the round PU. Same to the body of the file. Attach the round PU and the body with a flat stud. Don't forget to put string in the middle. I recommend it would be better if you tied a knot so that it won't easily get off from the hole.


This is the visual going to be. Sew both side of the body and you are done. It's that easy! You can use it as a file or a clutch depending on how you choose the colours and material. And you can actually give if to someone as a handmade present. It doesn't always have to buy any luxury gift but a handmade was a perfect present that shows your effort. All you need is to create something special because handmade is worth so much more.


I hope you guys enjoy the tutorial and have fun with it.